Silky Chocolate Pudding Cups
Highlighted under: Classic Bakery Favorites
I absolutely adore making Silky Chocolate Pudding Cups, especially when I crave something rich and satisfying. The smooth texture paired with deep chocolate flavor creates a delightful treat that’s perfect for any occasion. I love how simple ingredients combine to produce such a lush dessert, and each time I whip up a batch, I’m reminded of why this recipe has become a beloved staple in my kitchen. Plus, it’s incredibly easy to customize with different toppings!
When I first discovered this recipe, I was amazed at how easily I could create such a sophisticated dessert at home. I remember bringing these pudding cups to a dinner party, and the response was overwhelmingly positive. Everyone was surprised that I made them from scratch!
The trick is to ensure you slowly incorporate the chocolate into the mixture, allowing it to melt beautifully without clumping. This method gives the pudding its signature creamy texture and rich flavor that keeps people coming back for more.
Why You'll Love This Recipe
- Rich chocolate flavor paired with fresh orange zest
- Creamy texture that melts in your mouth
- Perfect for celebrations or as a sweet indulgence
Understanding Ingredients
The richness of the Silky Chocolate Pudding Cups lies in the quality of the chocolate you choose. Although bittersweet chocolate is recommended for its depth of flavor, you could substitute with semi-sweet chocolate if that's what you have on hand. Just be mindful that this could slightly alter the sweetness of your pudding, so adjust sugar levels accordingly. High-quality chocolate will melt smoothly and contribute to the overall silky texture, ensuring a luscious mouthfeel that tantalizes the palate.
Cornstarch plays a pivotal role in achieving the classic pudding texture. It acts as a thickening agent, ensuring your pudding sets properly without turning grainy. Be sure to whisk it thoroughly with the dry ingredients before adding any liquid, which helps prevent clumps. If you're looking for a gluten-free alternative, cornstarch works beautifully, but you could also experiment with arrowroot starch for a similar effect, though it may yield a slightly different consistency.
Perfecting Techniques
When cooking the pudding, patience is key. You must stir constantly over medium heat until the mixture begins to thicken and bubble. This process usually takes around 5 to 7 minutes. If you notice it clumping or cooking too quickly, lower the heat immediately to avoid burning and ensure a silky finish. The moment it starts bubbling, you'll see a noticeable change in thickness—this is the cue to remove it from the heat and add your chocolate and butter.
To prevent a skin from forming on the surface as the pudding cools, make sure the plastic wrap touches the surface directly. I find this detail particularly important for achieving that perfect, smooth texture when serving. If you prefer a more intense flavor, consider adding a touch of espresso powder along with the chocolate—this enhances the chocolate taste without overpowering it.
Ingredients
Gather the following ingredients before you start:
Ingredients
- 2 cups whole milk
- 1/2 cup granulated sugar
- 1/3 cup unsweetened cocoa powder
- 1/4 cup cornstarch
- 1/4 teaspoon salt
- 1 teaspoon vanilla extract
- 4 ounces bittersweet chocolate, chopped
- 1 tablespoon butter
Ensure all your ingredients are measured and ready for use.
Instructions
Follow these steps to create the perfect Silky Chocolate Pudding Cups:
Combine Dry Ingredients
In a medium saucepan, whisk together the cornstarch, sugar, cocoa powder, and salt until well combined.
Add Milk
Slowly whisk in the milk, ensuring there are no lumps. Place the saucepan over medium heat and continue whisking until the mixture thickens and starts to bubble, about 5–7 minutes.
Incorporate Chocolate
Remove the saucepan from the heat and stir in the chopped chocolate and butter until melted and smooth. Add the vanilla extract and mix well.
Chill
Pour the pudding into individual cups and cover with plastic wrap, making sure it touches the surface to prevent a skin from forming. Chill in the refrigerator for at least 2 hours.
Serve
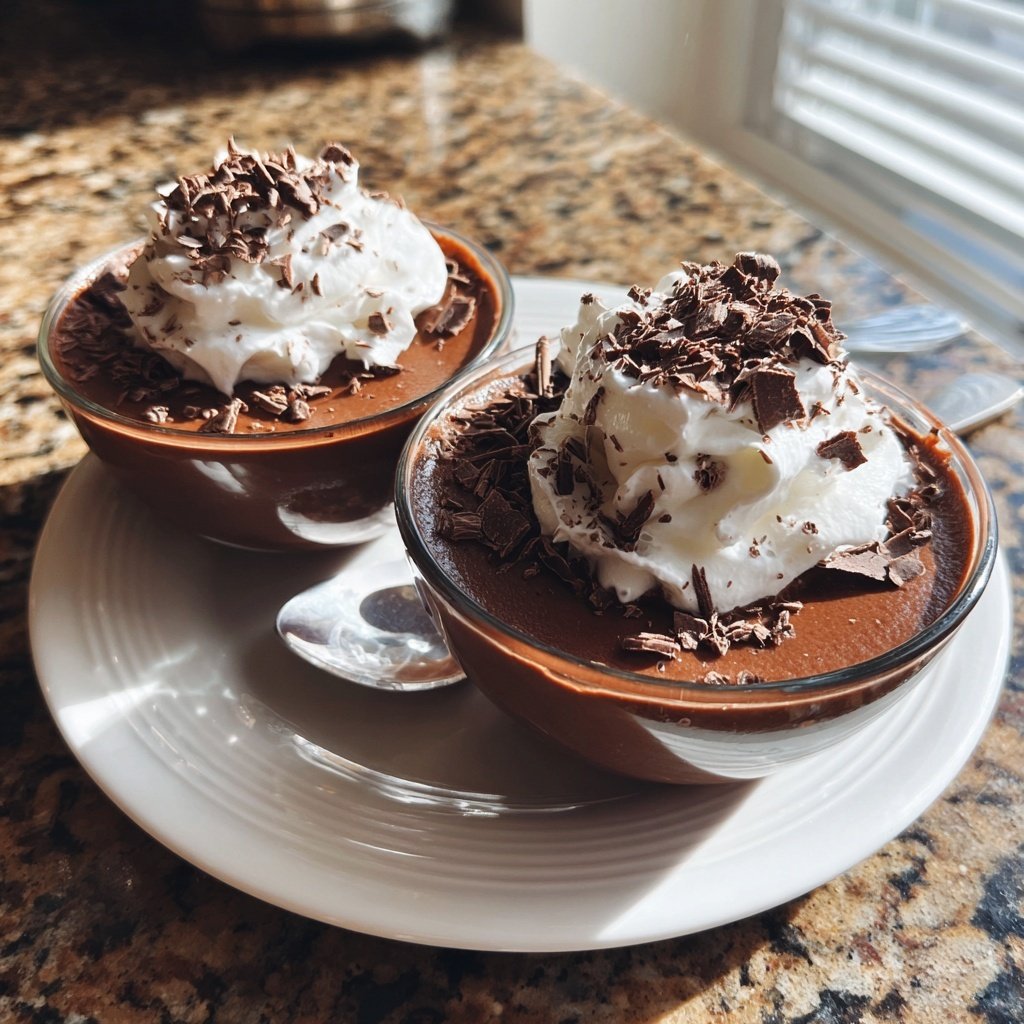
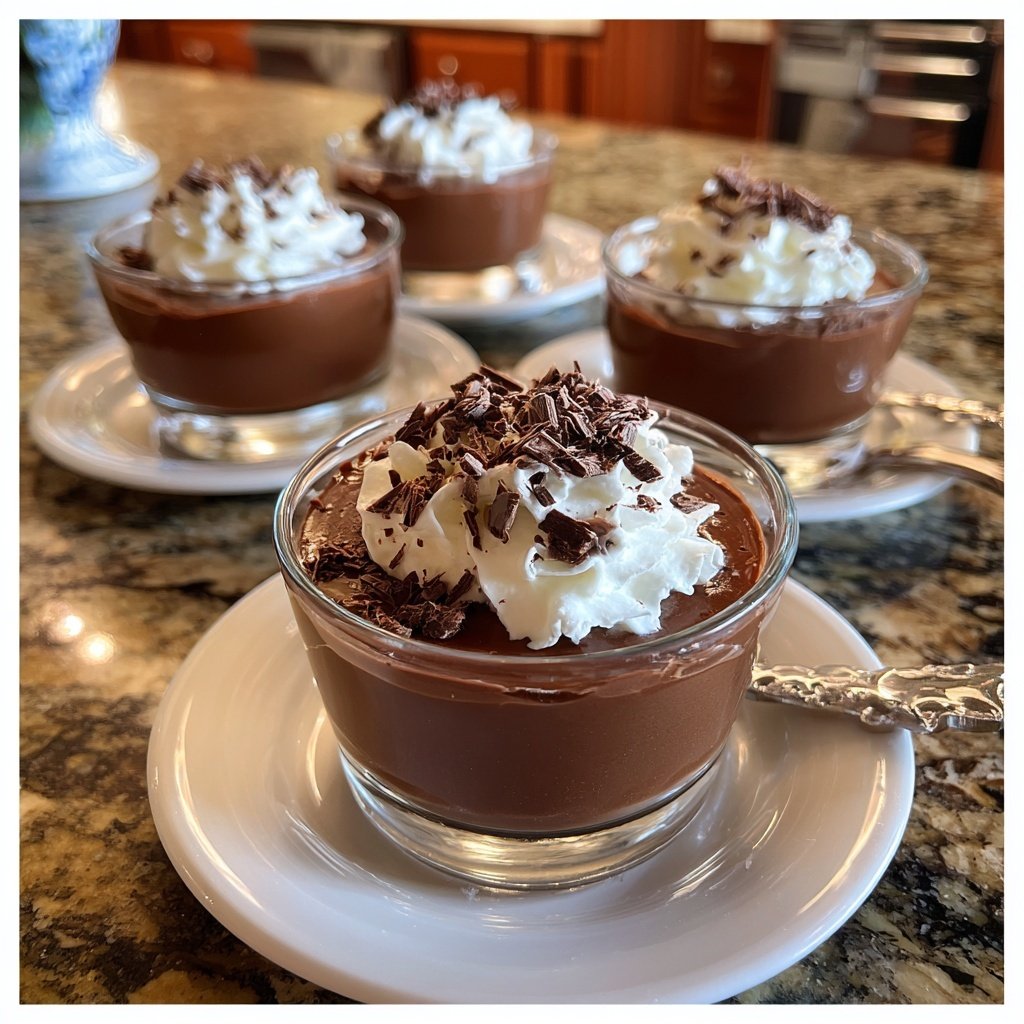
Before serving, you can top the pudding with whipped cream, chocolate shavings, or a sprinkle of sea salt.
Enjoy your delightful Silky Chocolate Pudding Cups!
Pro Tips
- For a fun twist, try adding a splash of orange liqueur or a pinch of instant espresso powder to deepen the chocolate flavor.
Serving Suggestions
These pudding cups can be elevated with various toppings, allowing for personalization. Whipped cream adds a lightness that contrasts beautifully with the richness of the chocolate. Alternatively, for a more indulgent experience, top with chocolate shavings or a caramel drizzle. A sprinkle of sea salt can also enhance the flavors remarkably, providing a delightful contrast to the sweetness and emphasizing the chocolate’s richness.
For a delightful twist, consider adding fresh fruit as a topping. Berries or slices of orange can give a refreshing burst that complements the chocolate. If you want an extra layer of texture, crushed cookies or nuts sprinkled on top provide both crunch and a variation in flavor profile.
Make-Ahead and Storage
One of the great advantages of Silky Chocolate Pudding Cups is how well they store. You can prepare them a day in advance, which makes them fantastic for entertaining. Just keep them covered in the refrigerator, where they will stay fresh for up to 3 days. This is especially helpful if you're planning a dinner party and want to minimize last-minute prep work.
If you're thinking of freezing leftovers, be aware that the texture may change. While the pudding will still taste great, it might separate or develop a grainy texture upon thawing. To mitigate this, I suggest only freezing if necessary and allowing it to thaw slowly in the refrigerator rather than at room temperature.
Questions About Recipes
→ Can I use a different type of milk?
Yes, almond milk or oat milk are great alternatives if you prefer a non-dairy option.
→ How can I make this pudding vegan?
You can use plant-based milk and replace the butter with coconut oil or a vegan butter alternative.
→ Can I make this pudding ahead of time?
Absolutely! Silky Chocolate Pudding can be made up to two days in advance and stored in the refrigerator.
→ What toppings work best?
Whipped cream, fresh berries, crushed nuts, or grated chocolate make fantastic toppings.
Silky Chocolate Pudding Cups
Created by: The Chef mario's recipes Team
Recipe Type: Classic Bakery Favorites
Skill Level: Beginner
Final Quantity: 4 servings
What You'll Need
Ingredients
- 2 cups whole milk
- 1/2 cup granulated sugar
- 1/3 cup unsweetened cocoa powder
- 1/4 cup cornstarch
- 1/4 teaspoon salt
- 1 teaspoon vanilla extract
- 4 ounces bittersweet chocolate, chopped
- 1 tablespoon butter
How-To Steps
In a medium saucepan, whisk together the cornstarch, sugar, cocoa powder, and salt until well combined.
Slowly whisk in the milk, ensuring there are no lumps. Place the saucepan over medium heat and continue whisking until the mixture thickens and starts to bubble, about 5–7 minutes.
Remove the saucepan from the heat and stir in the chopped chocolate and butter until melted and smooth. Add the vanilla extract and mix well.
Pour the pudding into individual cups and cover with plastic wrap, making sure it touches the surface to prevent a skin from forming. Chill in the refrigerator for at least 2 hours.
Before serving, you can top the pudding with whipped cream, chocolate shavings, or a sprinkle of sea salt.
Extra Tips
- For a fun twist, try adding a splash of orange liqueur or a pinch of instant espresso powder to deepen the chocolate flavor.
Nutritional Breakdown (Per Serving)
- Calories: 380 kcal
- Total Fat: 26g
- Saturated Fat: 15g
- Cholesterol: 195mg
- Sodium: 85mg
- Total Carbohydrates: 32g
- Dietary Fiber: 3g
- Sugars: 24g
- Protein: 6g